Winter Wear a Second Look: Behr DeckOver
Let’s review: The snow melt revealed that some of the edges on the stairs had cracked and peeled. Some of that damage was because of old-man-winter and some because of snowblower damage. As I looked over the deck I really did not see many issues beside the stairs. However, after washing and taking a second look I found multiple issues with deck boards. In addition, I will talk about the overall color change.
DECK BOARDS
In the following picture you will see a dirty deck but little to no issues on the deck board:

Compare that picture to the following which shows the washed deck the following day:

Of course some of the winter damage is difficult to see but the overall quick view reveals peeled areas that were the result of washing. Also, I am not sure the wash completely cleared/cleaned the deck. The deck color appears white or cloudy even after washing. This could be due to improper washing such as not letting the cleaner sit long enough, not rinsing completely, not scrubbing hard enough or improper ratio cleaner to water. Who knows? But all I know is what I see and the deck just does not look clean and the color seems to have faded.
The peeled areas were a unpleseant surprise. Those areas are scattered and I would say about 99% of deck is still covered and in good shape. I have provided some pictures that will give you an idea on the size of the peeled areas.

You can see from the picture above two small areas of peeling plus, the cloudy white appearance of the deck boards.

The above picture represents the largest area of peeling on the deck. Also, it appears that one deck board is host to multiple areas of peeling. Not sure why…
Here is one more picture…

This picture is representative of the few areas of peeling between the deck boards.
DOG CLAW MARKS
I have a dog. The dog has claws. She will lay down a long scratch on the deck when she leaves the deck in a hurry! The following images illustrate the scratches that currently exist on the deck. They are deep enough to leave an imprint in the wood! So it is a no brainer that the deck stain is going to show the scratch mark too. With time, the white scratches will diminish but you can still see the claw mark in the wood.


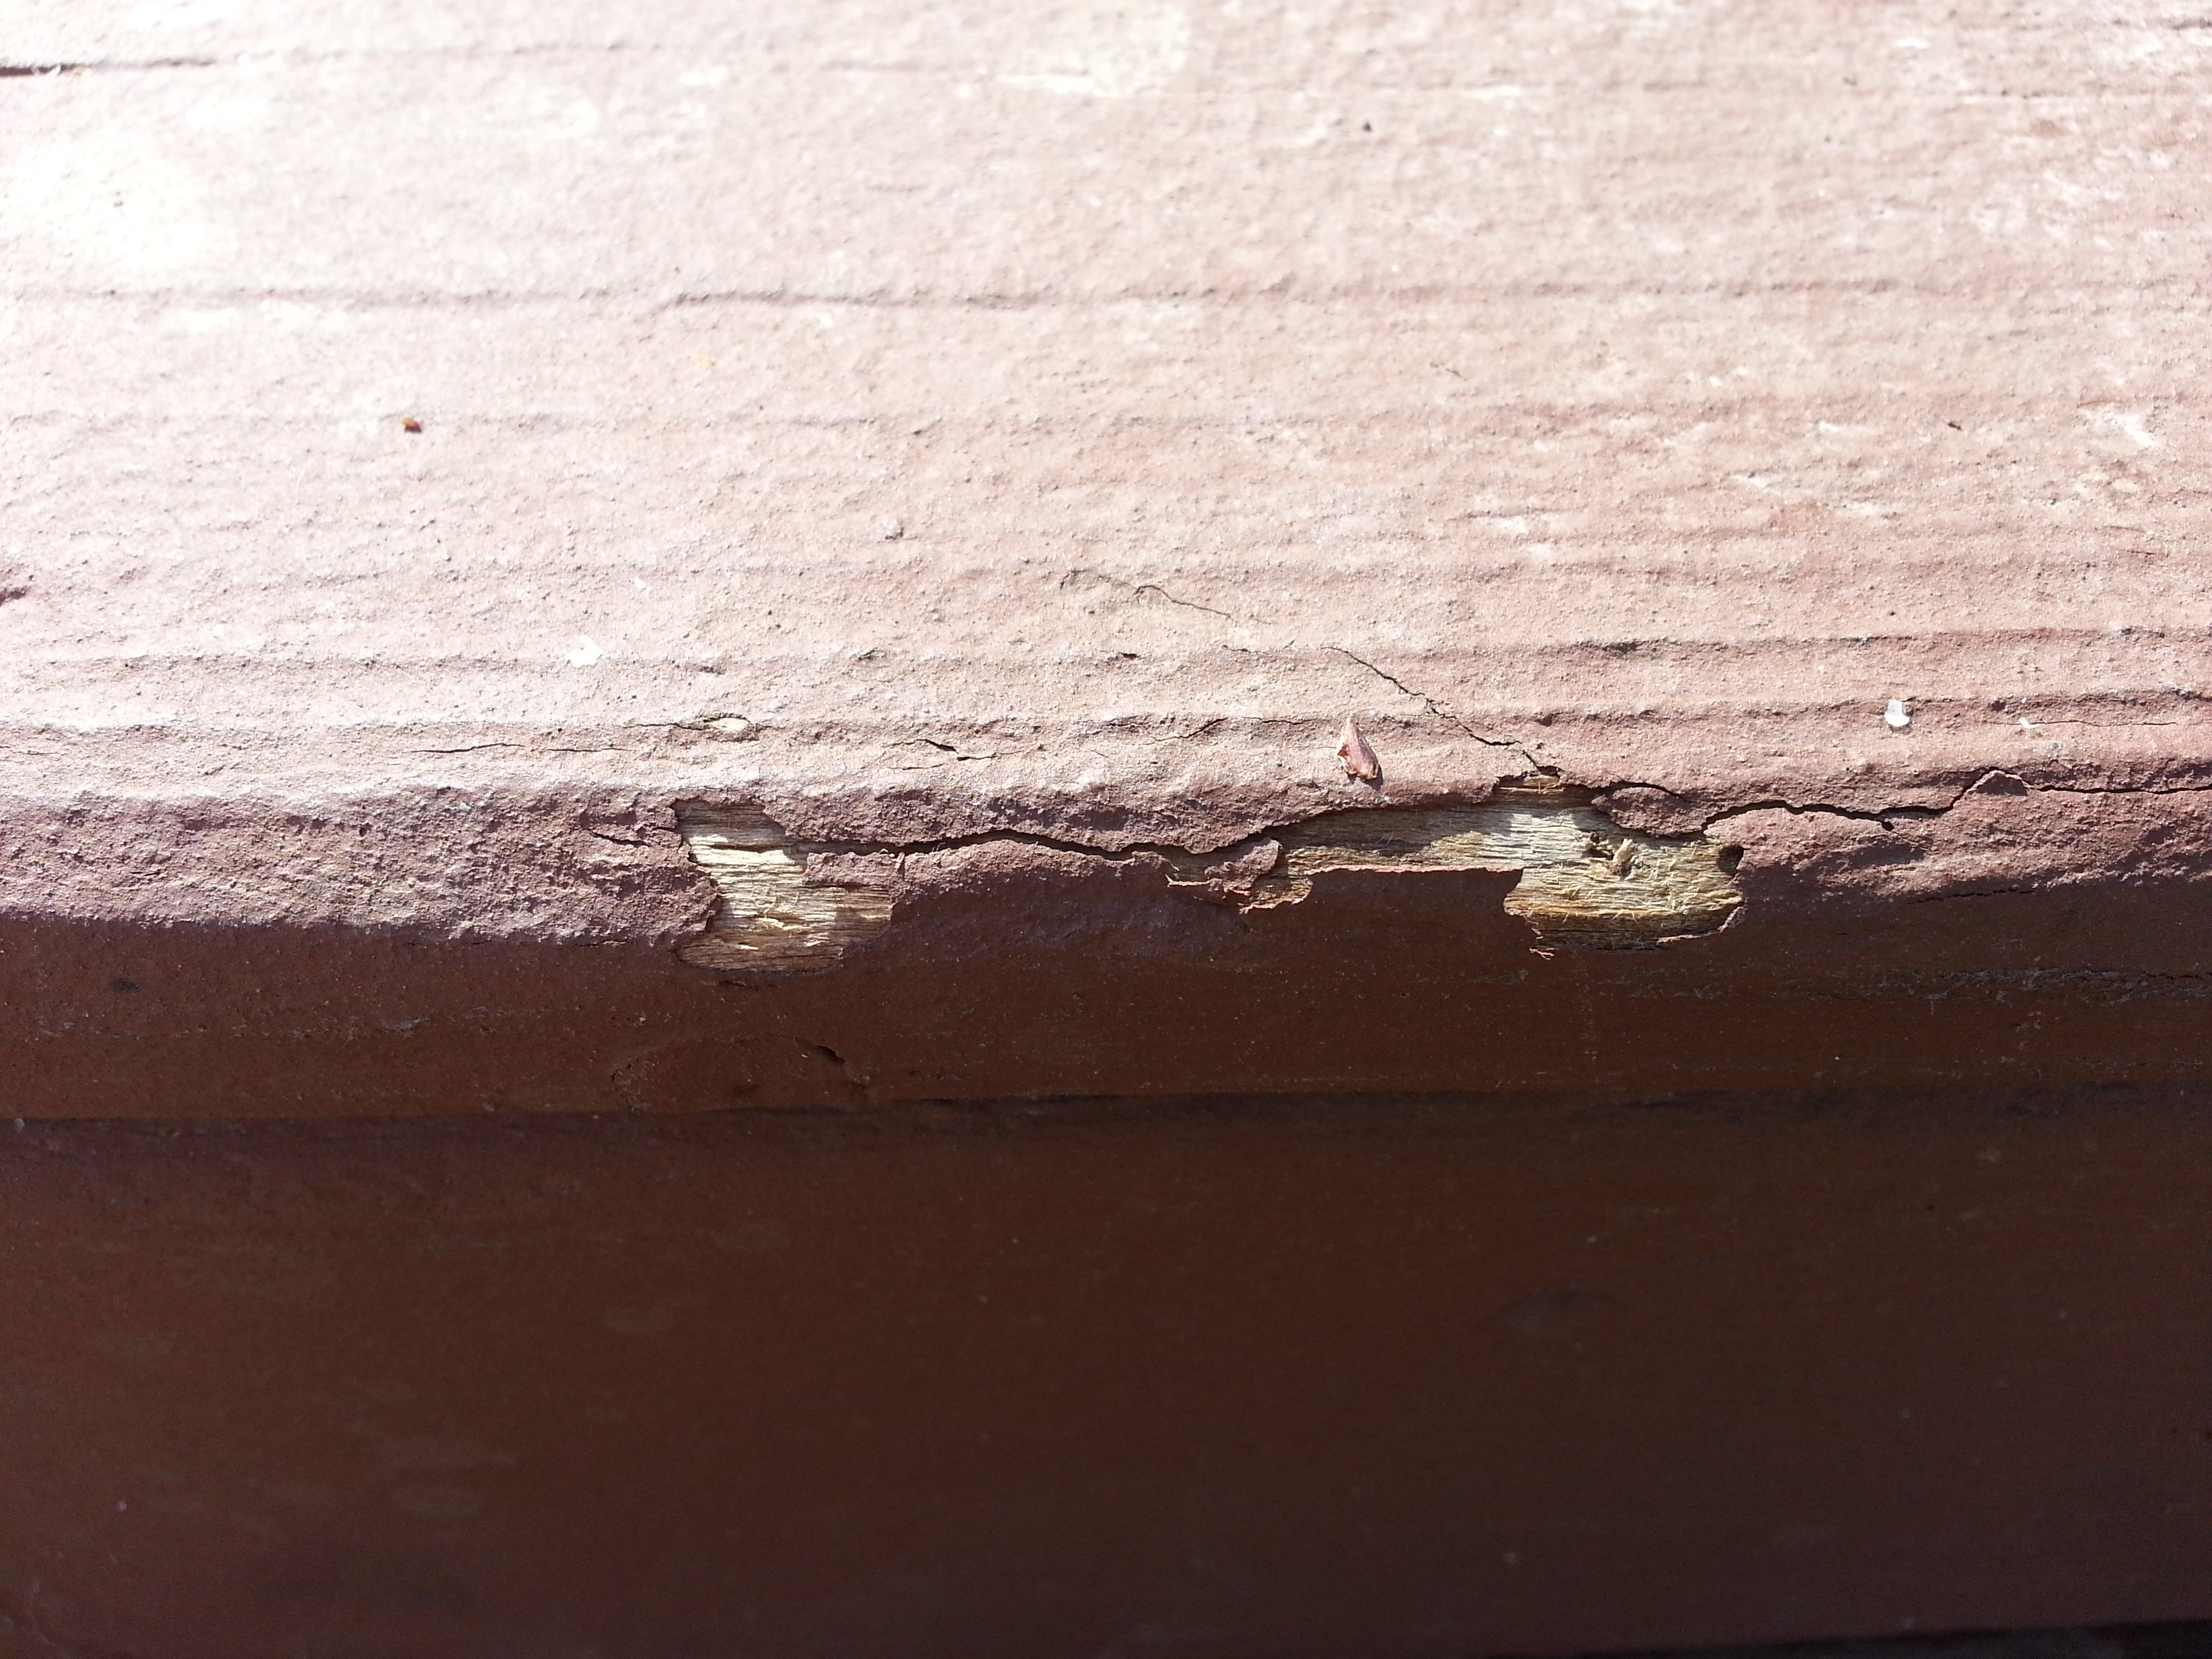
STAIR EDGES
The stair edges look like something chewed on them! They are by far the worst repair I will need to make because just about every stair edge is damaged. I am really dumbfounded as how to keep these from continued cracking and peeling next winter. Anybody have ideas? Shout them out in a comment! The following images give you a good view of the winter wear on the edges:


FINAL THOUGHTS
I will need to ponder how I am going to repair both peeling deck boards and the cracking stair edges. I can see doing some feather sanding around the damaged areas and maybe touch-up with more Behr DeckOver but I will give the Behr folks a call. Again, if you have any suggestions please share!!!!
Still pleased with the results? Yes, I am…really… Not happy about the repairs but still have most of the deck covered and in good shape.
Behr DeckOver: Spring Prep on the Deck

Well it is the first weekend in May and I am finally getting a chance to clean the deck. We just finished a month that recorded a little over 6 inches of rain in Minneapolis which places April 2014 as the second-wettest April on record. One of the news outlets called it the “Hydro Vortex” not to be confused with the “Polar Vortex” that kicked our butts this past winter. Regardless, I should be thankful because last April we had 18 inches of snow and these weather extremes will continue to be a good test for Behr DeckOver!
DECK WASH
I called Behr customer service this morning and they recommended that I use the Behr All-In-One Wood cleaner. So I will use my spray applicator, deck bristle brush and garden hose to give it a nice spring cleaning! It was a beautiful spring day here in Minnesota with a slight breeze, about 60 degrees and mostly sunny. Here are a couple of before pictures:
Dirty Deck!
Oh look, here comes Supervisor Kiko!

Before applying the deck wash I always like to cover plants and bushes with some tarps. Nothing is blooming yet but I think it is always better to protect and have no regrets later.


I followed the directions on the side of the label and after mixing I was ready to hose the deck down. I like to work in small areas so I wet one area thoroughly, apply the deck wash, let it sit, scrub, rinse and move on to the next area. Pretty simple. I found that in some areas I had to reapply because of the build-up of dirt. I applied medium pressure on the brush as I was scrubbing and I DID NOT use a power washer to rinse. Just a regular garden hose with a regular nozzle.

Wet Down…

Apply…

Scrub…

Rinse…
FINAL THOUGHTS
Prior to washing and as noted in earlier posts it was clear that several of the stair edges peeled and cracked due to winter wear. It will be interesting to see if any deck boards peel or chip after washing and as I have said several times in my posts – time will tell if Behr DeckOver will last and wear well! I will post after pictures soon as well as any pictures of additional peeling or cracking that has occurred after washing.
A LIVING DECK
As my work on the deck continues, I need to be reminded that this is a “living” deck. It is not a shrine! A deck that short of a few cold months is used daily and has steady activity from friends, family, neighbors, pets, children, deck parties and just about everything that mother nature can throw down! It is not a place that is just here for “looks” or to sit for an occasional cocktail.
We use it!
Rock on!
Behr DeckOver…Winter Wear

Winter on the Deck!
Let’s review the winter: As of April 16, 2014 Minneapolis recorded 69.5 inches of snow (and counting) on the season and we had a snow pack of at least 24 inches on the ground. The Polar Vortex pushed the Twin Cities into the top 10 for the most subzero temperatures ever recorded in a season with -49 degree windchills. Not the worst, but a pretty healthy winter in these parts.
So, how did Behr DeckOver stand up to this winter?
Let’s find out!
WINTER FUN ON THE DECK

Gotta have some fun! Finding our beach during a long, long Minnesota winter…
OK, BACK TO SOME SERIOUS STUFF: SHOVELING
I used a lightweight plastic shovel and early on in the winter season a broom. My strategy was to keep a single path clear to go out the backdoor, walk across the deck and down the deck stairs to access cars, shed, trash, etc… We didn’t really use the deck in the winter so I left most of the deck covered with a deeper snow pack. The walkway and the stairs had heavy use.

Snow Pack
STAIR WEAR
In the next image you can see that there is some exposed wood on the edge of the stairs. This is due to the snowblower rubbing up against the bottom stair. Next winter we will need to be more careful!

Stair Wear
Besides the very bottom stair edge issues caused by human error, there are also a “limited” number of areas on the edges of other stair-steps that have peeled/cracked. See image below…
The spots shown above are about an inch or less in length and my best guess were caused by the wear and tear of walking on ice and snow for five months.
DECK FLOOR BOARD WEAR
At this point, the deck has not been cleaned so I can’t really make a full assessment of its condition. However, I will say that first appearance indicates that the deck floor boards have held the Behr DeckOver Stain well! Color looks great! I have not seen any huge areas of cracking or peeling! Again, after cleaning I will take a better look. It will be interesting to see how the deck cleans-up because there is a lot of grit and dirt and paws prints from winter.
INITIAL THOUGHTS
Right now I am very pleased! I have to say that this is the first time EVER that I have looked across the deck after winter thaw and not cursed! There are a few issues I will need to deal with and will most likely call Behr for their advice. However, I believe I am not going to be staining the deck this summer!!
That is a beautiful thought!!!!
For now, I will hold-off giving Behr DeckOver a full thumbs-up as I will need to figure out how to repair the stair edges. I will be back later with some additional pictures and thoughts after a good cleaning.
The Daily Grind…Behr DeckOver Wear & Tear
ABOUT ONE WEEK LATER…
It was fun to put everything back on the deck and sit back and enjoy after all the hard work! I wanted to share some of the things we have done that will hopefully offer a little protection to the new Behr DeckOver stain.
TABLES & CHAIRS & FLOWER POTS…OH MY!
We have two older tables that have straight metal footings…

I know they don’t look the best but hey, better than grinding the stain off… Picked them up at Home Depot.

There is a large flower pot in the corner of the deck and you can see a plastic ring underneath. It is as large as the pot and keeps it off the deck.

This ring will offer great protection from the weight of the pot. Picked this up at a local garden center.
This year we purchased a new patio set and thankfully the chairs have a little protection on their “feet”…

You can also see in the background a deck rug that will offer additional protection.
We recently had a small deck party and had no issues with scuffs or scratches or chunks of the stain peeling off.
THINGS I CAN’T CONTROL…

Meet Kiko the dog…
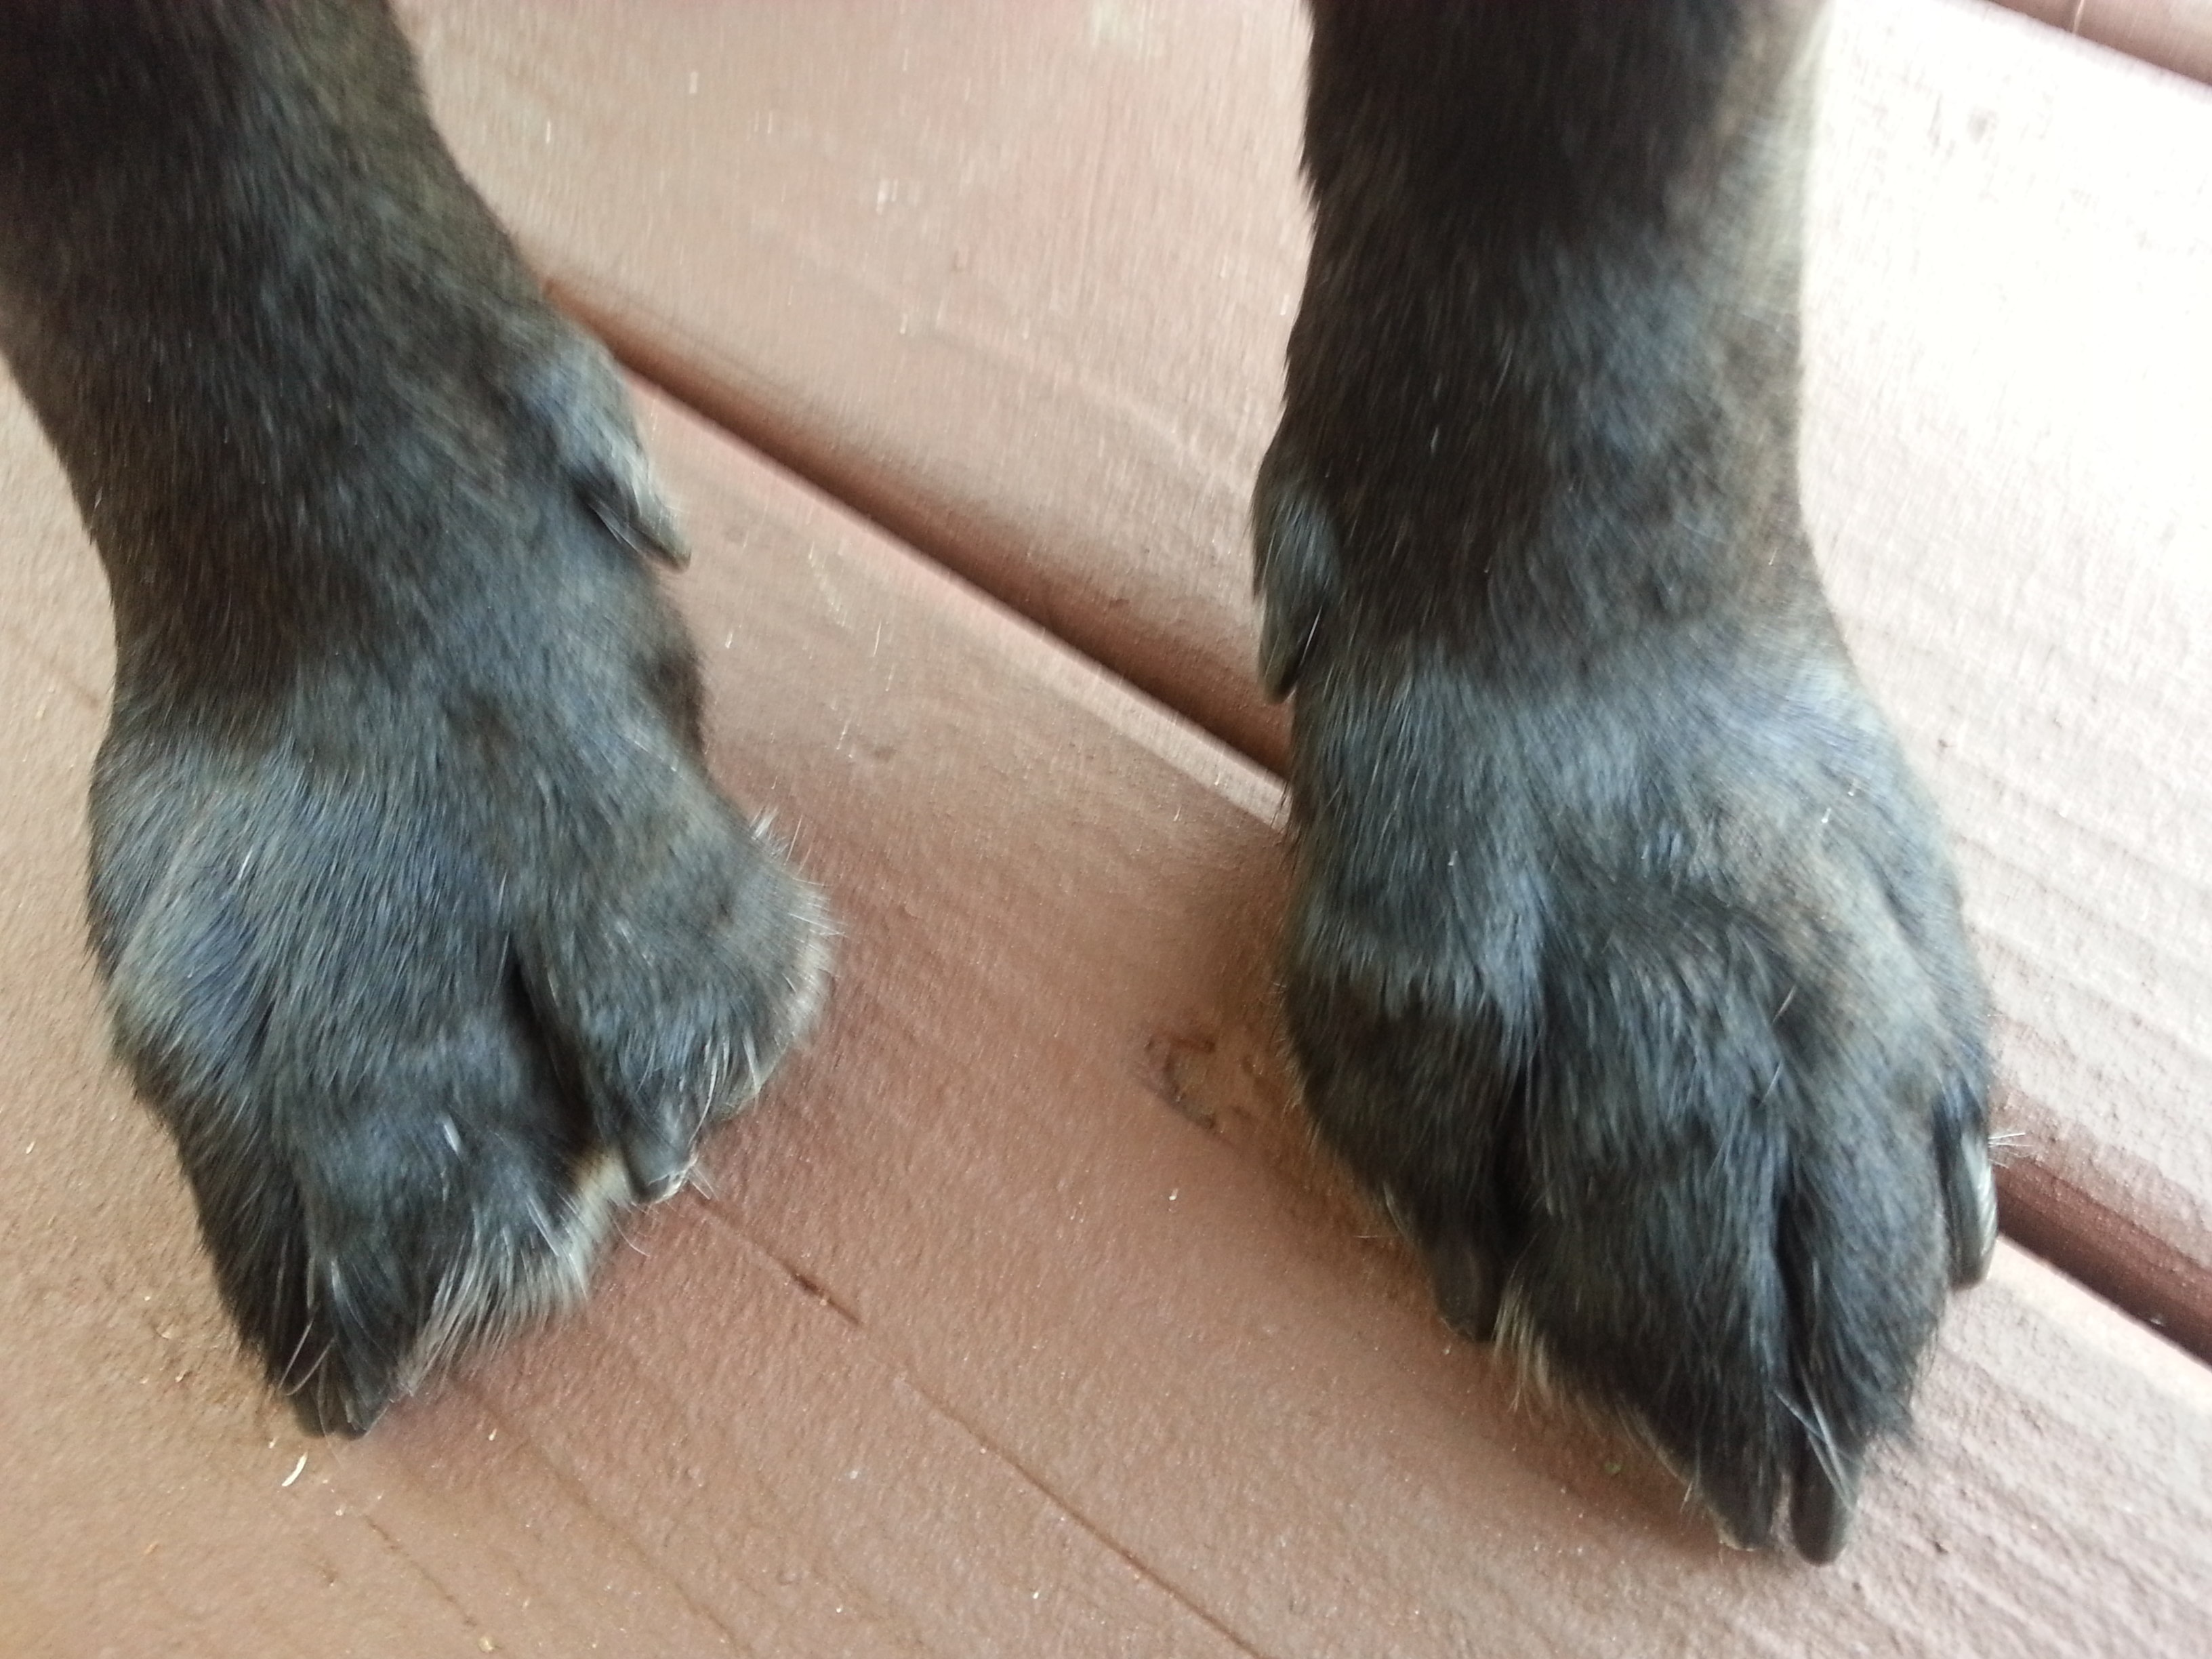
…and her feet/claws
She is a 40 pound Black Lab & Beagle. In one week of wear including a deck party complete with small children she is the one that created the first scratches.

Claw marks…she got excited and dashed off the deck when another dog was walking by…
It’s a deck and she is a dog. Not going to get too bent-up about it…
Also, in a earlier post I talked briefly about the heat on the deck.

Kiko is sitting on the one spot that has been in the sun all day. No problem.
Stain in the deck!

BEFORE: Time to clean the beast!
HERE WE GO!
DECK WASHING
Everything purchased and a stretch of nice weather – low humidity and in the 80’s. The deck faces east so it gets the morning sun. There is a huge maple next door that does provide some shade so the plan is to work early morning and later afternoon as the deck is in full shade as the day goes by.
The first order of business is cleaning. As I mentioned earlier I purchased Rustoelum deck wash and I plan to use it instead of buying the Behr product to match the stain.

I purchased an applicator and had the deck broom from earlier cleanings. I also used a regular hose and nozzle which did the job.
The cleaning was uneventful and I loved the applicator which had a flat end and a fine spray to really control the product! I was able to break the deck into six areas for cleaning including the small landing and stairs. I would spray, leave it on for the few minutes and then start brushing with the deck broom finishing with a rinse with the hose. It took a couple of hours and I let it dry for almost 2 days. The reason for the extra dry day was due to all the rain we had prior to cleaning. The deck without much stain for protection had a lot of moisture absorbed already prior to cleaning.
One other thing, I used a Toro Leaf Blower to clear off the spinners and loose debris prior to washing.

Looks better already!
I have used a power washer in earlier cleanings and staining’s and opted not to use this time as very little stain was on the deck and I felt I could scrub and remove whatever I needed with the wash and a little elbow grease… It turned out just great!
PREP WORK
The railing tops, skirt and in-between the boards got their first coat. This proved to be very time-consuming because I wanted to make sure all the nail holes and cracks were filled. Seriously, lots of time here… You can see from the pictures that just running a brush over the holes and cracks is not enough. You have to “dab” the paint with a brush tip if you want to make sure of good coverage. Thank goodness for the garden cart on wheels as I spent a lot of time rolling along and painting between the boards and filling cracks and holes…a little classic rock helped too.

Just when you think enough product is on the nail…

All kinds of results! I wanted all the little imperfections covered and this initial step took at least a day to complete. The product is thick but not thick enough to cover deeper cracks and holes.

Attempting to fill larger knots or holes meet with mixed results.

Longer cracks had to be filled by “dabbing” with a stain-loaded brush several times. I was able to fill most but several are still visible after 2 coats.

Prep work


Prep the landing…
USING THE PRODUCT
Let’s talk a little about Behr DeckOver the product. I hate to even call this stuff stain because it doesn’t act like any stain I have ever used. Is it thick? Yes! It has a little grit and a “sparkle” when it dry’s. If you have ever baked a cake or watched someone make one it is the consistency of cake batter! No lie! Also, if “any” amount of sun is on the stain while it is in your tray or pail a thick film begins to form – almost immediately.
I also found out as with any stain, the cooler the deck the better the application as the brush became “clogged” very quickly as things became warmer. Not being a professional painter of any kind I end up loading the brush with a ton of paint. I kept trying to be careful but some hard dabbing of paint into cracks and holes caused some issues with the brushes. I had 4 different brushes on hand to handle all the needs – in-between the boards, nail holes, railings, etc…
Generally speaking I believe this product gets thicker and more difficult to work with as the temps go up. It does not “run” like stain but will drip and then dry very quickly. There were spots that I dabbed paint into and did not do a great job brushing them out and when I went back it was too late.
A side note is that this product cleans up very nicely with soap and water. It is easy to use and applies great as long as you don’t load the brush up too much and the heat is not working against you.

Cake batter!

Too much sun. You can see the darker film forming on the stain.
STAINING THE DECK BOARDS
I applied the stain on the railing with a brush and a roller on the deck boards. It went on easily and I loaded the roller (3/8″) with a lot of product so the first coat to the deck boards took a lot of product! I think almost a gallon… I was able to brush back and forth. Working in the shade allowed me to put the product on and still go back and smooth-out uneven strokes. Also, the roller covered two deck boards which helped in being efficient. I had the first coat on in less than an hour.


The label stated that you can wait 4 hours and apply the second coat which in my case the deck had over night and into the next day before the second coat was applied. The deck railing and the deck boards got their final coat without issues. I seemed to use less product this time.
RESULTS
Well, here it is!
After spills and thrills it has been quite a few interesting days wondering if this was ever going to get done! I am by no means an expert at this kind of stuff and overall I am pleased with the results.

Railing top…
Landing…

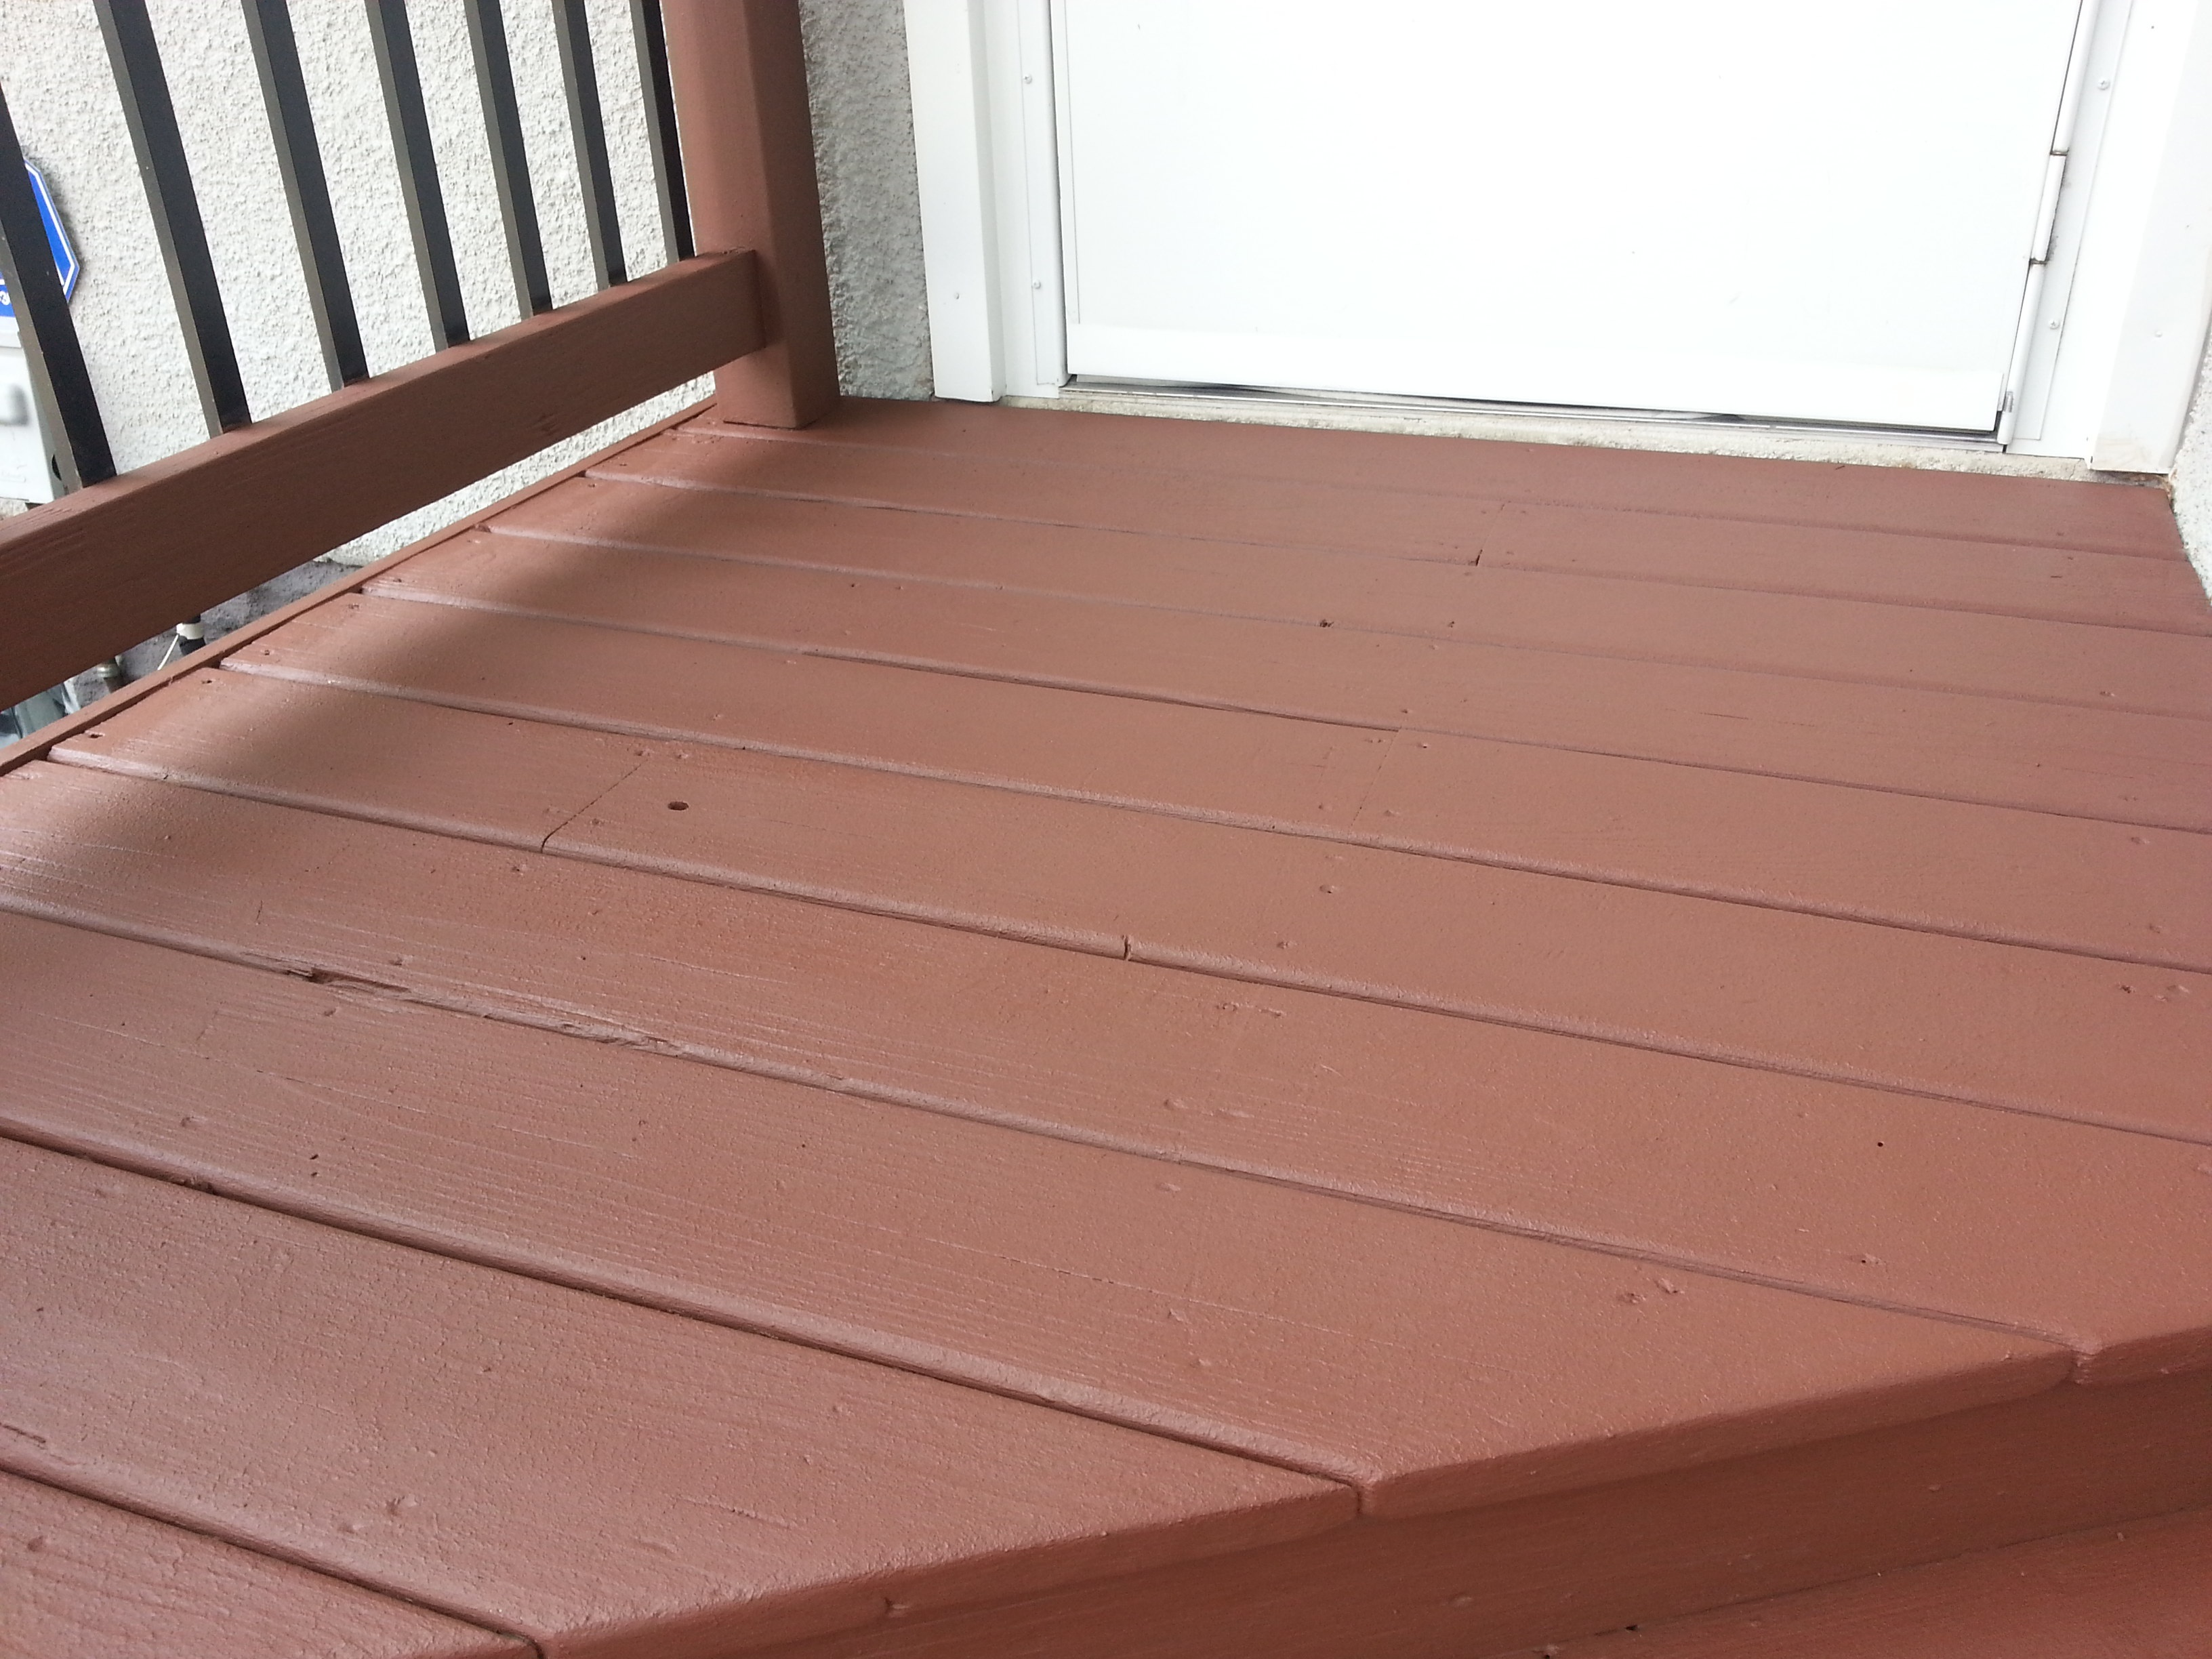
Deck…

AFTER: Deck and stairs…complete with a big splat of BIRD CRAP on the steps! Can never have anything nice for too long!
FINAL THOUGHTS
When I began researching Rustoleum and Behr I was looking for a product that would cover and restore a neglected deck more thoroughly than a thinner stain. I initially wanted to use Restore because from the videos and pictures it seemed to give the max coverage and greater protection due to its thickness. However, I chose to go with DeckOver thinking it would give me better coverage than regular stain but not as thick as Restore and perhaps easier to apply. Now, I will never know if Restore was the product to go with but these are some thoughts…
Likes: DeckOver was easy to apply and clean-up and has provided better coverage of old and worn boards than any other stain I have used. So far, NO cracks, NO peeling and NO white blotches. If you compare my application of this product to other pictures/videos of DeckOver it was not a complete coverage of all the deck board imperfections. It certainly did not cover like pictures/videos of Restore. So if you are looking for your deck to have a “composite-deck” look this may not be the product.
When you run your hand across a board you can feel the grit but not to the point that it is going to cut your hands or feet or cause discomfort to your pets. My cat and dog are walking and laying on the deck without issues.
It is not a smooth finish like a stain which I was looking for in this product. My hope is that this thickness will provide better protection for longer years to come in the extreme weather we have in Minnesota.
Dislikes: This could be due to “operator” error but it did not cover deeper cracks and holes. I keep seeing the video of the Restore product rolling over cracks and splinters and filling them with ease…again I will never know. I also understand that this product has its limits and will not cover or fill the larger cracks that have appeared because of my neglect but I was hoping that after an initial fill and two coats that I would get more favorable results. I think that I could have also been more careful to apply more product to uneven boards. So as much as I say this is a dislike I think the product acted and did what it was supposed to upon application.
Another dislike was the heat on the deck boards. Ok so let’s talk about this as I did read about added heat somewhere during my research. As I mentioned earlier part of the deck gets the morning sun and a good chunk of afternoon sun before complete shade in late afternoon/evening. Now I have walked on this deck for several years with and without shoes – all times of the day and never noticed the deck being too hot to walk on. However, I took about 4 steps out on the deck yesterday without shoes and felt the heat on the bottom of my feet! Wow! I did not linger and quickly went inside searching for shoes… (The dog and the cat didn’t seem to mind too much yet…) There is a definite increase in heat…don’t know why but it is there! I am not too concerned and we will adapt and adjust as needed.

Appearance of a long crack after initial “dabbing” and 2 coats later. Many smaller cracks are completely covered.

A close-up of a board that did not get full coverage…to the right near the shadow. I could have been more careful…After calling the 1-800 number they recommended that since it was still newly stained that I could “dab” additional stain and pull it out with the brush. They said I could get a slight variation in color but that was a risk I was willing to take…
The deck will have 5 days to cure before furniture and flower pots are placed back on the surface. We have walked very little on the deck and mother nature has been kind in giving us this spectacular stretch of weather! Going on 5 days without rain!
WHAT IF IT RAINS?
I did call the 800 number on the can as I had some concerns about rain coming earlier in the application process. Customer service was great as they answered all of my questions and gave me advice about what to do if it rains. This is what they said about rain…STOP STAINING! The person from Behr even looked at the radar and weather forecast for my area and we discussed what to do. They stated that if whatever I had stained did not have at least the recommended time to dry (24 hours) then I ran the risk of compromising the stain…peeling, bubbling, etc… We also talked about covering the deck with tarps if needed however, they really stressed to stop staining and wait it out…
HOW MUCH STAIN DID I USE?
In the end, I used 4 gallons of stain and it was down to the last drop too! I don’t have vertical wood railings so I know that saved me both time and product. I wish they had a smaller container that I could buy for some touch-ups…
WINTER CARE
I plan to use a plastic snow shovel and also a broom for lighter snow removal during the winter. Time will tell if this product will withstand the weather, pets, deck chairs, people and anything else that comes its way…
RECOMMEND OR NOT?
Today, I can recommend Behr DeckOver. I love the color and it was pretty true to what I expected. It is a lot of work staining a deck hence the title “stain in the deck”, but right now I feel pretty good about the results!
I hope to post from time-to-time about its life. Hopefully this information will help anyone who stumbles into this blog. I know I was searching for anything and everything to make that perfect decision.
Happy staining and rock on!
Research Deck Stain Products
Before I started I was initially leaning toward the Restore product so I had bought their deck wash and a spray applicator about a week in advance. Restore seemed to be the best product for a deck in tough shape. It appeared to be really thick and would last a lot longer than regular stain because let’s be honest….who really wants to spend their spring days staining?
Like most folks these days I searched the internet and also spent some time at the local Home Depot talking to folks about different products. Of course, they had samples of wood planks that were treated with Restore and DeckOver. I could see that Restore was much thicker and had much more “grit” than DeckOver. However, I could see that the DeckOver also gave a nice finish to their sample wood planks but offering less grit and perhaps a smoother finish.
Below are a FEW of the websites and videos I viewed…
If you check-out facebook pages you get current comments and questions that are helpful. Make sure to click posts by others. In the end, of everything I viewed and researched I found the facebook pages provided a true look into what is happening and how Behr and Rustoleum are responding to issues… Great pictures too.
After reading and watching many different sources I determined I would use Behr DeckOver. It seemed that both products had their share of hideous results blended in with some great outcomes. However, I felt I did not want to work with the thickness of Restore and that the Behr product would give me coverage, less grit and easier application. I had read and viewed videos that stated you should only brush one-way with the Restore product and it seemed like a slow application process. Now, it may come back to bite me in that I did not choose Restore and DeckOver will be a total disaster… Time will tell.
But off we go with Behr DeckOver in hand!
Final Purchases:
4 Gallons ($35 per gallon) – Russet Color
Paint roller covers 3/8 in
3 pack of brushes
Paint tray liners
Small trim bucket and liners
Box of white rags
Also, I am pushing some crooked numbers in age these days so I have a small garden cart with wheels that I will use to scoot across the deck to help paint between the boards.

Stuff
Let’s stain the deck…

So the deck, long neglected was due for a makeover. In the photo you can see that very little stain is left and the big maple next door just dropped its spinners….lovely! This deck resides in Minnesota and on a good day is 14×14 ft in size. Ya hey der it has a tough time in the harsh weather extremes of Minnesota. It is 7 years old and has been stained twice in its life. The photo was taken on a spring day which in this area could be in July but let’s call it mid to early June. First orders of business is clean the beast and decide on a product to use. So, I have been seduced into the new products as advertised on TV; Rustoleum Restore and Behr Deckover. Must do some research…
